
Update for Camunda 8.8
Note: This step-by-step guide takes advantage of agentic AI features and capabilities in Camunda 8.7. Please see our latest step-by-step AI Agent Guide to implement a similar process using Camunda 8.8 alpha functionality.
Building your first agentic artificial intelligence (AI) process is easier than you think. Our intention in this post is to provide you with step-by-step instructions to create that first process using agentic process orchestration with Camunda. If you’re new to Camunda, you can get started for free here.
Within BPMN, there is a construct called an ad-hoc subprocess. An ad-hoc subprocess in BPMN is a type of subprocess where tasks do not follow a predefined sequence flow. Instead, tasks within the subprocess can be executed in any order, repeatedly, or skipped entirely, based on the needs of the process instance.
In Camunda, this workflow pattern enables the injection of non-deterministic behavior into otherwise deterministic processes as ad-hoc subprocesses: the ad-hoc subprocess serves as a container where the exact sequence and occurrence of tasks are not pre-defined but rather determined at runtime by leveraging LLMs.
This is the implementation path for Camunda’s support for AI agents, as it allows portions of the decision-making to be handed over to an agent for processing. That processing can include human tasks as well. This approach provides the AI agent some freedom, with constraints, about what actions should be processed.
For a better understanding of Camunda’s terminology, we have provided our definition of an AI agent below:
An AI agent is an automation within Camunda that leverages ad-hoc subprocesses to perform one or more tasks with non-deterministic behavior. AI agents can:
- Make autonomous decisions about task execution
- Adapt their behavior based on context and input
- Handle complex scenarios that require dynamic response
- Integrate with other process components through standard interfaces
AI agents represent the practical implementation of agentic process orchestration within the Camunda ecosystem, combining the flexibility of AI with the reliability of traditional process automation.
These subprocesses provide access to actions that can improve decisions and help to optimize the completion of tasks and choices. They can be easily integrated into your end-to-end business process.
Model overview
Our example model for this process is a fraud detection process when submitting tax forms.
The process begins when a form is filled in by a user who wants to submit information for their tax return. An OpenAI bot checks the data provided for any indication of fraud. The AI bot will determine which tasks, from a list of tasks, to perform for this set of criteria. The appropriate tasks within the ad-hoc subprocess will then be activated running in parallel until all are completed.
The tasks that can be performed are located in the ah-hoc sub process and are:
- Send an email asking for more information,
- Ask a human expert for their opinion,
- Declare that fraud has been detected.
Each of these options triggers a different type of action. For example:
- Sending an email activates two tasks,
- Asking an expert activates a front-end application,
- Detecting fraud will activate an escalation event that will cancel the process. This could initiate another process to investigate the fraud, of course.
Let’s jump right in and build the process.
Assumptions and initial configuration
A few assumptions are made for those individuals who will be using this step-by-step guide to create their first agentic AI process. These are outlined in this section.
The proper environment
In order to take advantage of the latest and greatest functionality provided by Camunda, you will need to have a Camunda 8.7.x cluster or higher available for use. You will be using Web Modeler and Forms to create your model and human task interface, and then Play and Task List when executing the process.
Required skills
It is assumed that those using this guide have the following skills with Camunda.
- Form Editor – the ability to create forms for use in a process.
- Web Modeler – the ability to create elements in BPMN and connect elements together properly, link forms, and update properties for connectors.
- Play – the ability to step through a model from Modeler.
- TaskList – the ability to open items and act upon them accordingly as well as starting processes.
GitHub repository and video tutorial
If you do not want to build this process from scratch, you may access the GitHub repository and download the individual components. Accompanying this guide, we have created a step-by-step video tutorial for you. The steps provided in this guide closely mirror the steps taken in the video tutorial.
Connector secrets
Separating sensitive information from the process model is a best practice. Since we will be using a few connectors in this model, you will need to create the appropriate connector secrets within your cluster. You can follow the instructions provided in our documentation.
If you do not have existing accounts for the connectors that will be used, you can create a SendGrid account and an OpenAI account. You will then need to get an API key for each service which will be used in the Camunda Console to create your secrets.
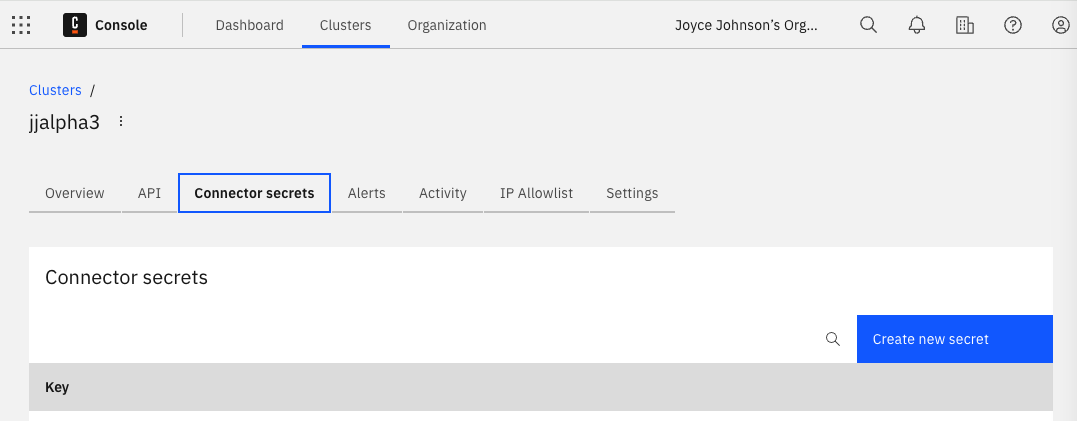
The secrets will be referenced in your model using {{secrets.yourSecretHere}} where yourSecretHere represents the name of your connector secret..
For this example to work you’ll need to create secrets with the following names:
- OpenAI
- SendGrid
Building your process
Creating your process application
The first step is to create a process application for your process model and any other associated assets. Create a new project using the blue button at the top right of your Modeler environment.

Enter the name for your project. In this case we have used “Agentic Fraud Detection” as shown below.
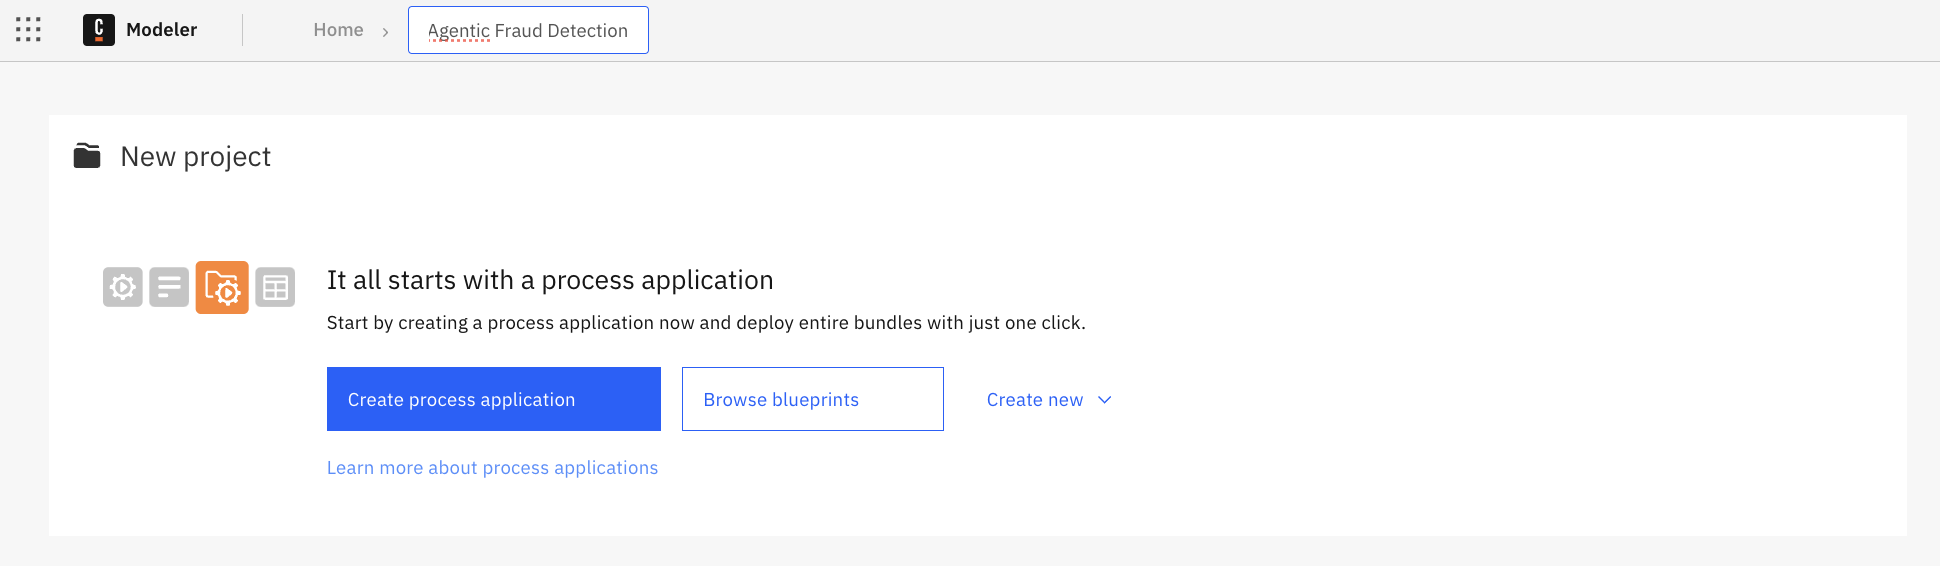
Next, create your process application using the blue button provided.
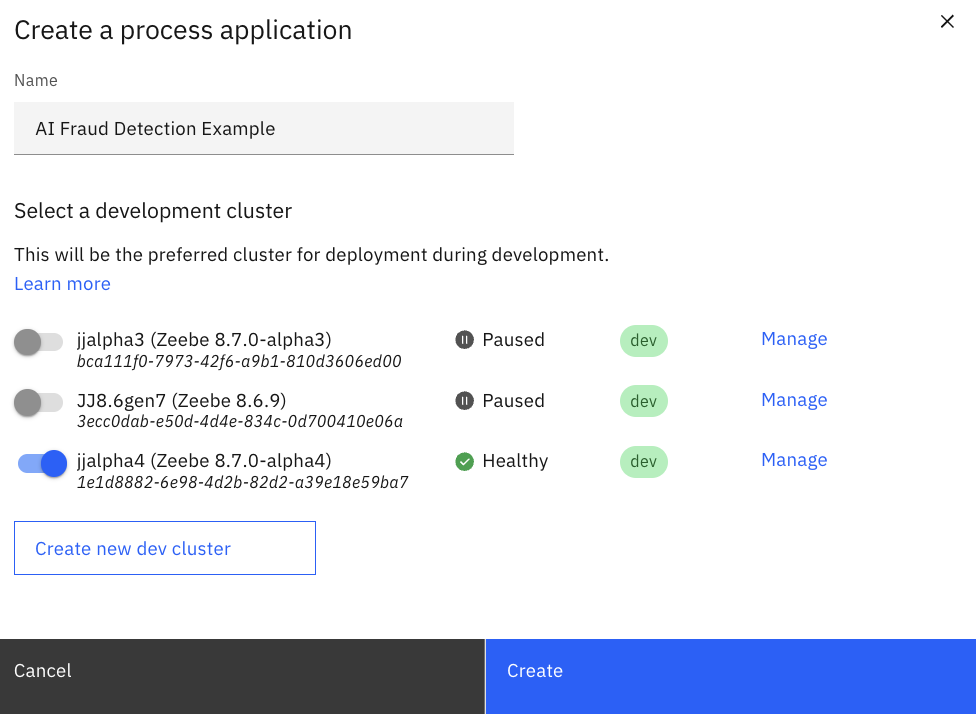
Enter the name of your process application, select the Camunda 8.7.x cluster selected for your project, and select “Create” to create the application within this project.
Initial model
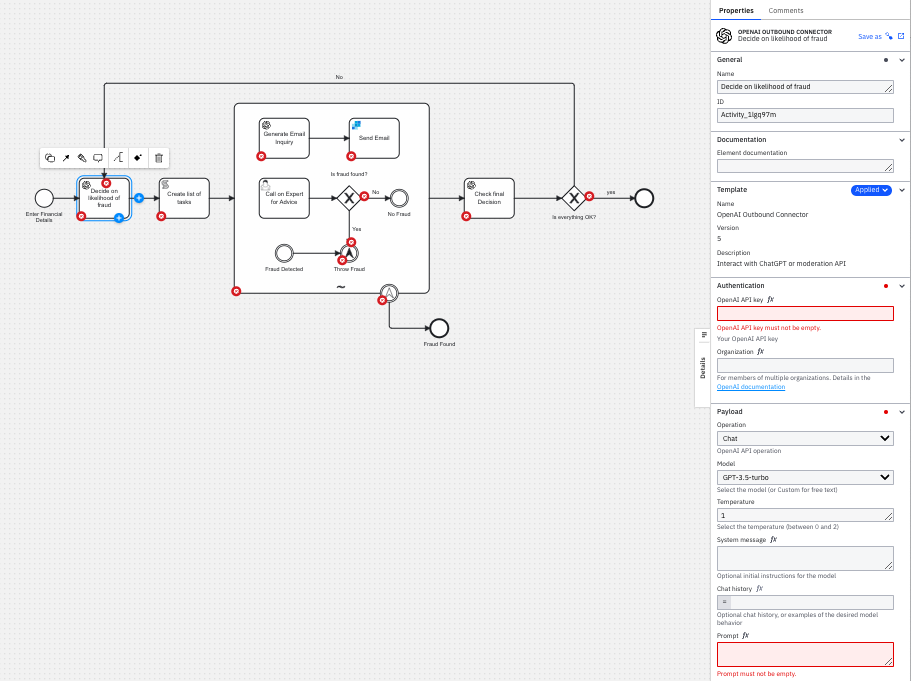
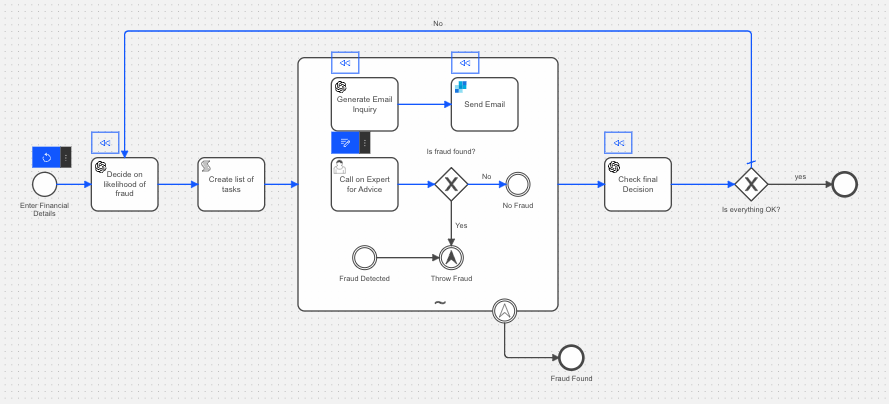
The next step is to build your process model in BPMN and the appropriate forms for any human tasks. We will be building the model represented below.

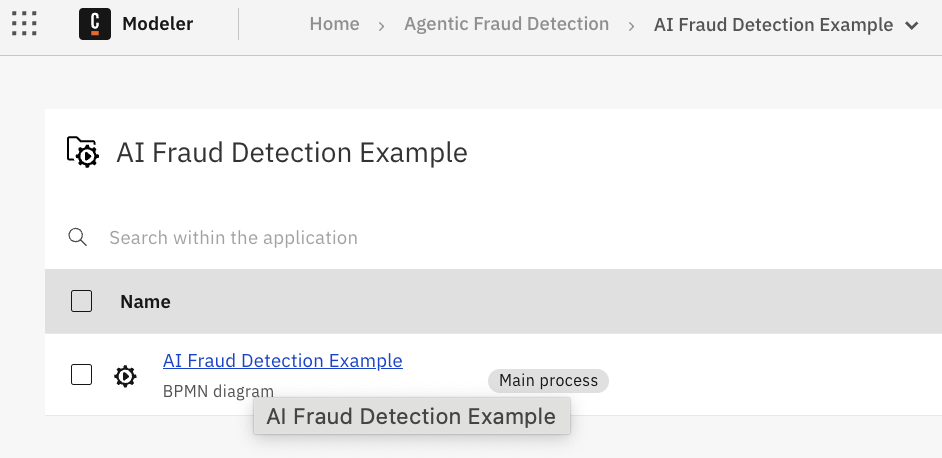
Click on the process “AI Fraud Detection Example” and we will begin building out the model in BPMN off the start step provided.
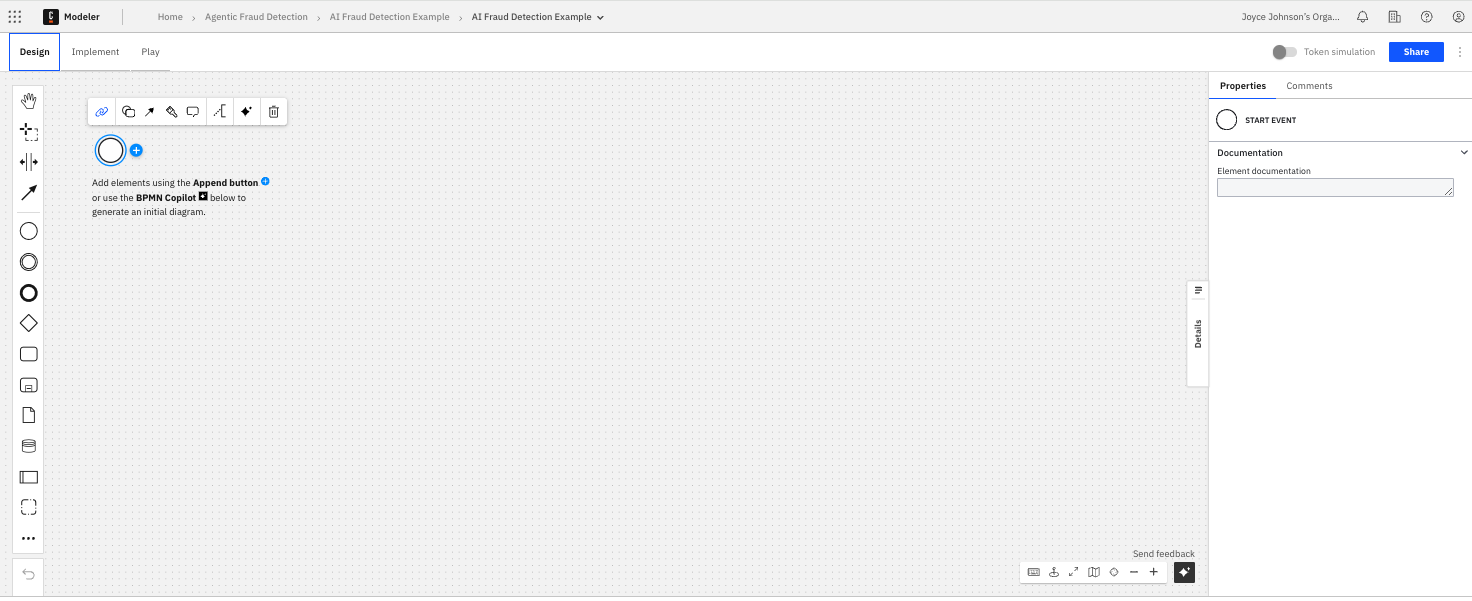
We will start by building our model in Design mode as shown below.
These steps will help you create your initial model.
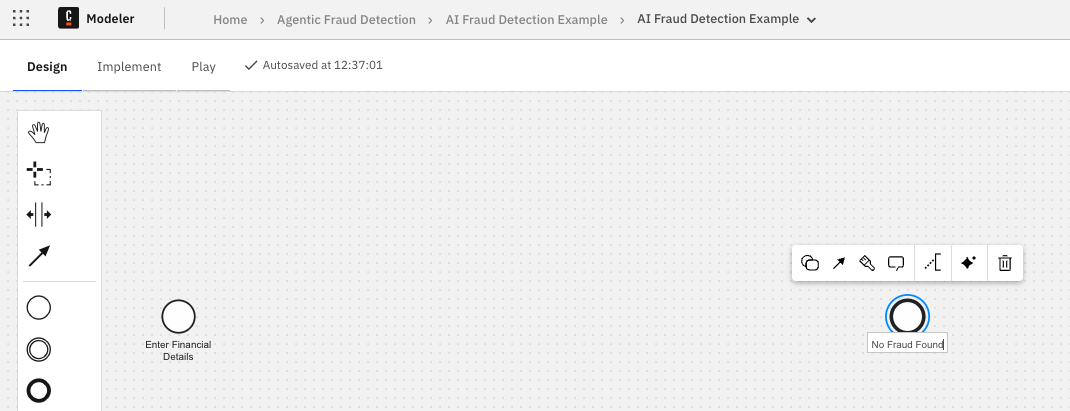
- Name your start event. We have called it “Enter Financial Details” as shown below.

- Add an End Event and call it “No Fraud Found.”
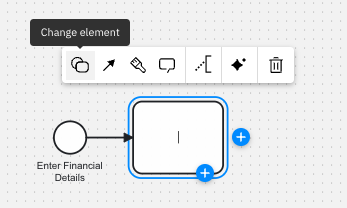
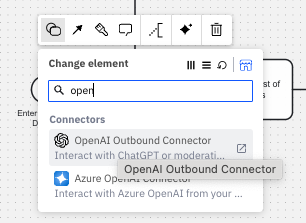
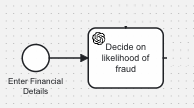
- Create a task after the start task. Change it to an OpenAI Outbound Connector task and call it “Decide on likelihood of fraud” as shown below.
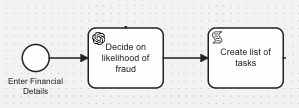
- Create a Script task after the OpenAI connector task that will be called “Create list of tasks” and will provide a list of tasks based on the OpenAI decision that will be run in the ad-hoc process.
Creating the ad-hoc subprocess
Now we are at the point in our process where we want to create the ad-hoc subprocess that will be used to trigger the appropriate components based on the decisions made by the previous tasks. Just complete these steps to create the ad-hoc subprocess for your model.
- Drag and drop the proper element from the pallet for an expanded subprocess.
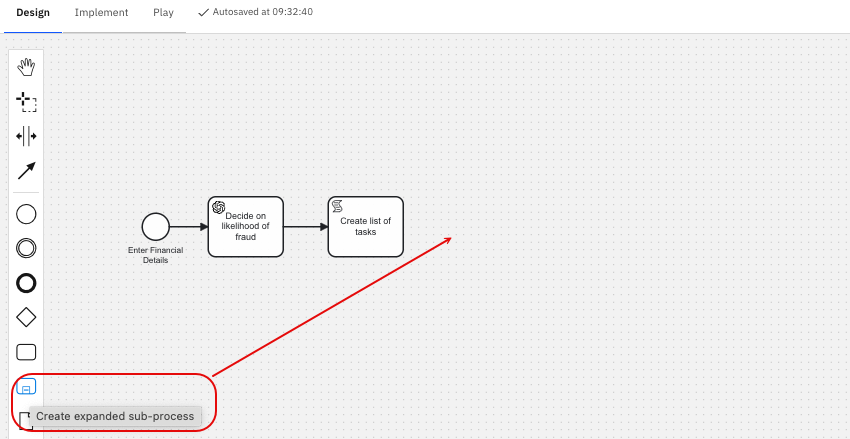
Your process will now look something like this.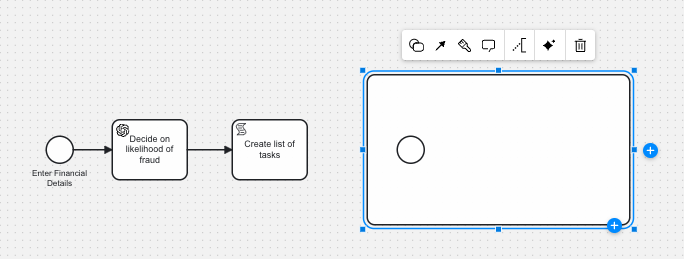
- Now this is a standard subprocess, which we can see because it has a start event. We need to remove the start event and then change the element to an Ad-hoc subprocess.
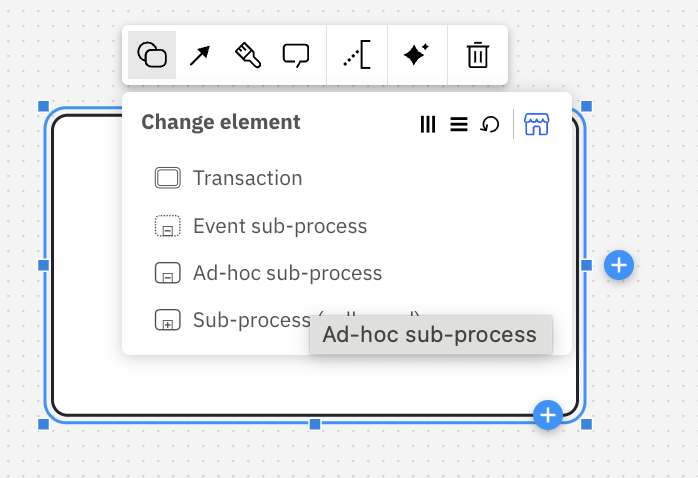
Once the type of subprocess is changed, you will see the BPMN symbol (~) in the subprocess denoting it is an ad-hoc subprocess. And don’t forget to connect your script task to the subprocess.
This is the key to our process, as the ad-hoc subprocess will contain a set of tasks that may or may not be activated. Although BPMN is usually very strict about what gets activated, this construct allows us to control what gets triggered by what is passed to the subprocess. - Take a little time to expand the physical size of the subprocess as we will be adding elements into it.
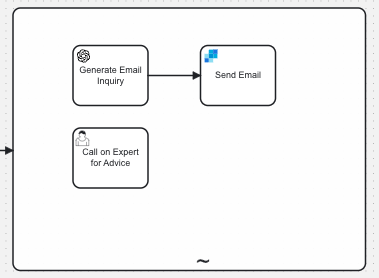
- As mentioned, one of the options is going to be sending an email to request additional information. Create two connected tasks inside the subprocess, the first is an OpenAI connector task called “Generate Email Inquiry” followed by a SendGrid connector task called “Send Email“ as shown below.
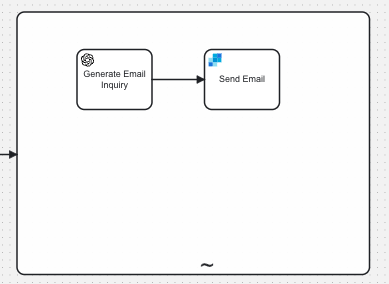
You will use the “Change Element” option to select the OpenAI Outbound Connector and the SendGrid Outbound Connector.
So the act of sending the email has two elements: generating the email content and then sending the email. - Now we want to add the option to call on an expert for advice, so add a task called “Call on Expert for Advice” and be sure to change this to a User Task.
This enables us to create a front end form to interact with a human as part of the ad-hoc process. - Finally, we want to add the option to trigger fraud, so we will add an event to the subprocess called “Fraud Detected” which will then throw another event which is an escalation event, as shown, which will be called “Throw Fraud.”
This escalation event is going to throw the process out of the ad-hoc subprocess.
- We are going to catch this fraud throw event with a boundary event on the subprocess and change it to an escalation boundary event. This will just end the process for our example.
Click on the ad-hoc subprocess and create the catch event, as shown below, then connect an end event called “Fraud Found” so that your diagram looks something like what is shown below.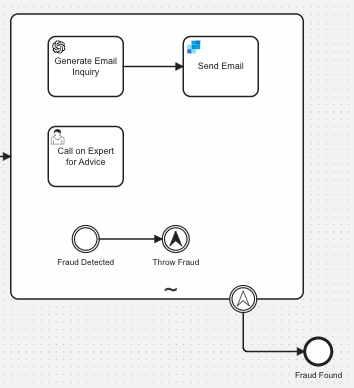
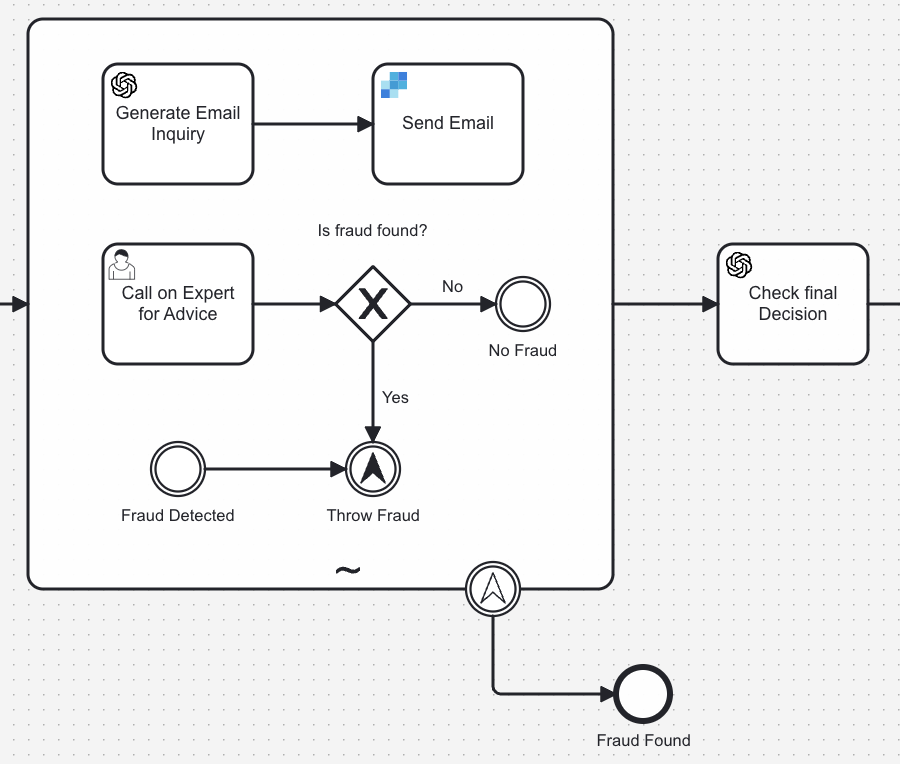
- Let’s give the option for the expert to also stop the process if fraud is indicated. So, add an exclusive gateway with the option for a “No Fraud” event or to Throw Fraud as indicated below. Be sure to label your gateway and the branches as indicated.

This gives us two cases where fraud can be found: the AI bot can find fraud or the expert can find fraud, both triggering the end of the workflow.
Finalizing the process
Now that we have completed the ad-hoc subprocess, we have a few more things to add to finalize our overall process.
- We want to add another task to the overall process before the final end event. Create another OpenAI connector task, which will serve as an AI bot called “Check final Decision” to confirm that the decision made (fraud or not fraud) is accurate.
- If it is determined that the decision is not accurate, we need to return to the “Decide on likelihood of Fraud” element to rerun the ad-hoc subprocess. In order to do this, add an exclusive gateway after the “Check final Decision” OpenAI task called “Is everything OK?”.
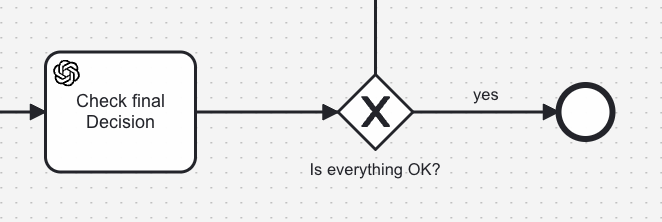
If we are happy with the decision, the process ends (the “yes” path) and if we are not happy, then this will return to the “Decide on likelihood of fraud” (the “no” path).
Now you have completed the design of our model, we move to the Implement tab to make sure we provide all the proper parameters configured.
Optional: Creating forms
Let’s start by creating the forms you will need for the human tasks in this process. You will need two (2) forms for this process. You are welcome to create your own forms or use the ones in the GitHub repository link provided. To build your own, follow these instructions.
Enter Details of Tax
The first is the initial form that will be used to initiate the process called the “Enter Details of Tax” form. The completed form should look something like this.
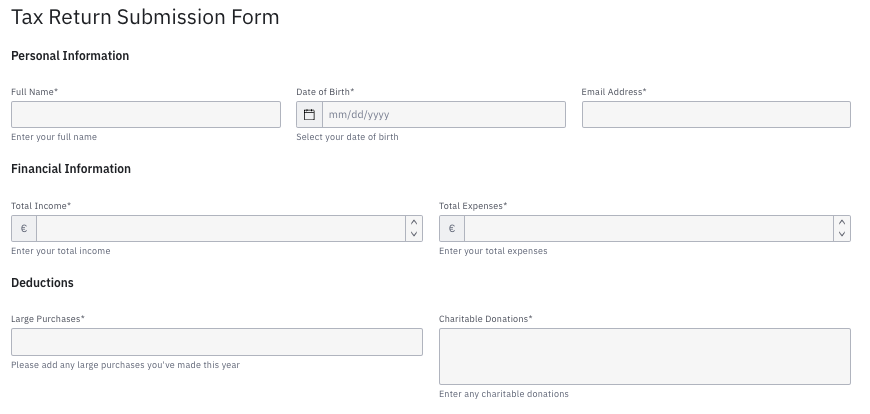
You are welcome to create the Text view fields for the title, “Tax Return Submission Form” and to separate the information on the form into three sections although they are not necessary. The Text view fields as shown in the image are:
- Personal Information
- Financial Information
- Deductions
You will need the following fields on this form:
| Field | Type | Description | Req? | Key | Other |
| Full Name | Text | Enter your full name | Y | fullname | |
| Date of Birth | Date Time Subtype:Date | Select your date of birth | Y | dob | |
| Email Address | Text | Y | emailAddress | Validation pattern: Email | |
| Total Income | Number | Enter your total income | Y | totalIncome | Prefix: € or $ minimum: 0 maximum: 9999999 |
| Total Expenses | Number | Enter your total expenses | Y | totalExpenses | Prefix: € or $ minimum: 0 maximum: 9999999 |
| Large Purchases | Tag list | Please add any large purchases you’ve made this year | Y | largePurchases | Options source: Static Static options:
|
| Charitable Donations | Text | Enter any charitable donations | Y | charitableDonations |
View Tax Details
The final form is used to view the results for the likelihood of fraud providing a human to make that determination. It is called the “View Tax Details” form. The completed form should look something like this.
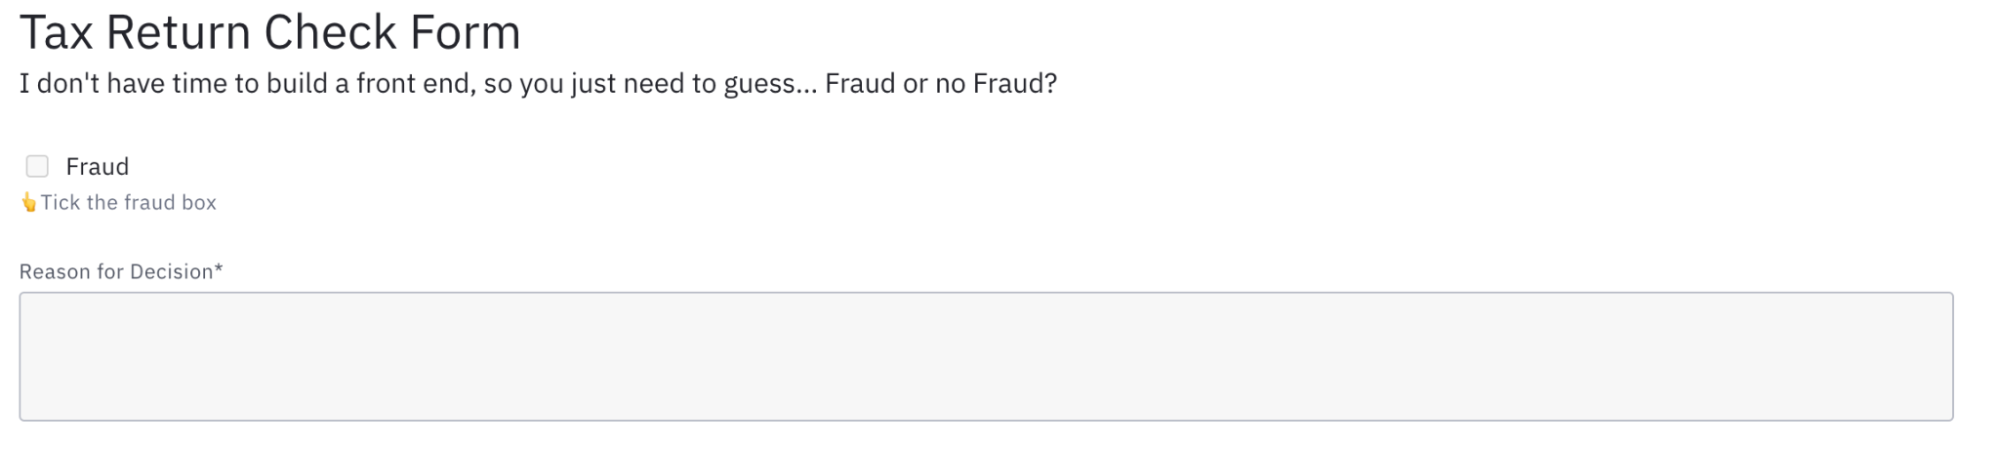
You are welcome to create the title Text view field “Tax Return Check Form” and the subtext “I don’t have time to build a front end, so you just need to guess . . . Fraud or no Fraud?”
You will need the following fields:
| Field | Type | Description | Req? | Key | Other |
| Fraud | Checkbox | ????Tick the fraud box | N | fraudDetected | Default value: Not checked |
| Reason for Decision | Text | Y | expertAnalysis |
Obtaining and linking your forms
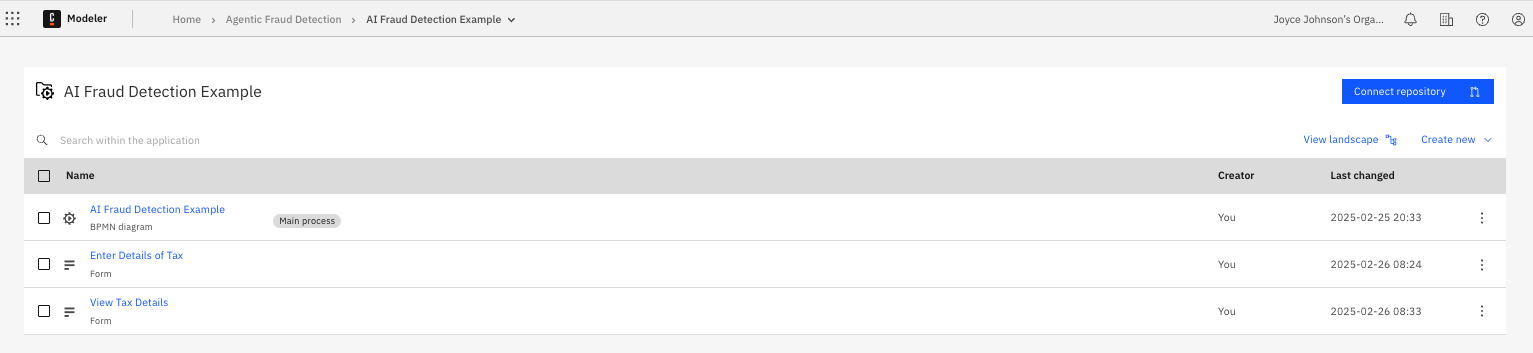
If you created your own forms, they will already exist in your process application. If not, please download them from the GitHub repository provided to your project before starting this set of steps.
To import these forms in your project, simply select “Create New->Upload Files” and select the two downloaded forms. Now your Camunda process application should look something like what is shown below.
Now that we have the form files, we need to link them to the appropriate elements. First, you will need to switch to the Implement tab so that you have access to the required features.
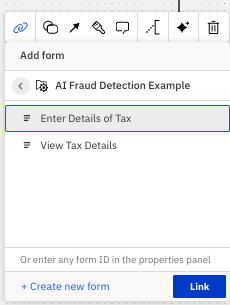
- Select the start event (Enter Financial Details) and select the chainlink from the menu as shown below:
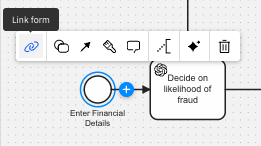
- Select the form named “Enter Details of Tax” and click “Link” to attach this form to your start event.
You can now view this form by selecting “Open in form editor” from the link icon and you can review the details of the information that will be entered to initiate the process.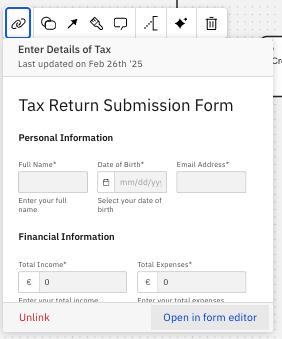
When opened in “Validate Mode” within the form editor, you can see the Form Output in the lower right hand corner of the UI. This information will be important when we go through our process later.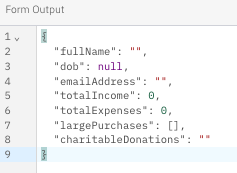
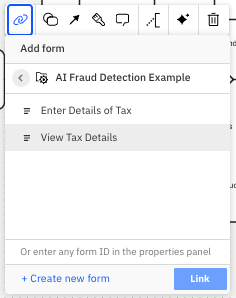
- Go back to Modeler and select the “Call on Expert for Advice” human task and link the other form, “View Tax Details,” to this task.
Now that our forms are connected, we just have to make a few final configurations before stepping through this process.
Configure remaining elements
You should still be using the Implement tab so that you have access to the required features to update the properties for the required elements. At this time, you may also want to confirm that you are validating against Zeebe 8.7 or higher.

Decide on likelihood of fraud
As mentioned, you must create connector secrets for the OpenAI and the SendGrid connector elements. Now we need to add those secrets to the proper places in the process.

- Select the “Decide on likelihood of Fraud” OpenAI task and update the properties to include the secret and prompt.
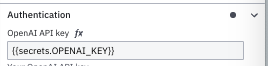
- You will want to check the name of your connector secret for OpenAI in the Camunda Console (in our case it is
OPENAI_KEY) and enter that into the Authentication location as shown below.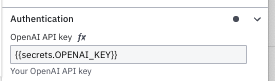
Remember the secrets will be referenced in your model using{{secrets.yourSecretHere}}whereyourSecretHererepresents the name of your connector secret. - The next thing we need to enter is the Prompt that will be sent to OpenAI. This prompt is key to our example because it builds based on the values provided in the intake form and will then ask OpenAI to make a determination about fraud.

Click the fx icon to change the input method for this field to a FEEL expression, which will look like this: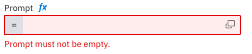
Click the boxes to the right in the field to open the pop-up editor which will provide additional space to enter the expression.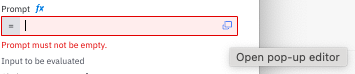
Copy this text into the field:
“I’d like your opinion on if this hypothetical situation could be fraud or not.” + fullName + ” has submitted details of his economic status to a hypothetical government. They are as follow: Date of Birth” + string(dob) +
” Total Income ” + string(totalIncome) +
” Total Expenses ” + string(totalExpenses) +
” Charitable Donations ” + charitableDonations +
” Large purchases ” + string join(largePurchases , “, “) + ” I’m going to need you to respond strictly in the following format: with nothing more than one, two or three of the following words separated by commas. ’email’ If the person submitting should be asked to clarify anything. also add ‘human’ if a human expert could be used in clarifying the submission. If neither option could justify the submission add the word ‘fraud'”
Click the “X” in the upper right-hand corner to close the pop-up editor and your properties should now look like what is shown below: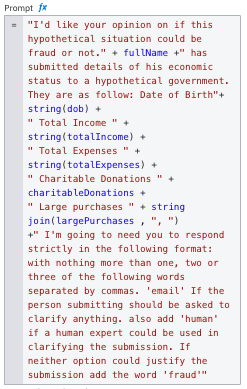
- Finally, we need to modify the result expression for this task so that the output will be easier to use in our model. Replace the existing line in the field with the following.
<code>{response:response.body.choices[1].message.content}
Your result expression should now look like this: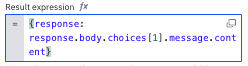
Taking this action allows the process to parse the response appropriately to provide just the metadata that we need.
Create list of tasks
Now we want to use the results provided by our OpenAI request to create the list of tasks that will trigger the optional elements in our ad-hoc subprocess. If you recall, the prompt had some key words:
- human
- fraud
If these are found in the results from the OpenAI request, this will guide us on which optional elements to trigger.
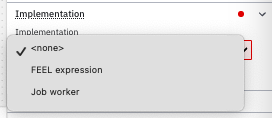
For this script task, we are going to generate the list of tasks, so we need to expand the Script section of the properties to modify the Script variables for this task. We can do this by adding a Result variable of tasks and then a simple FEEL expression which will generate the list from our OpenAI response.
Select FEEL expression for the Implementation.
Enter this FEEL expression in the properties for the script task.split(response, ", ")
Your properties for the script task will now look like this:
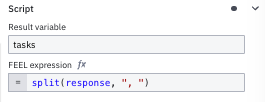
The results of this script is a list of tasks in the variable tasks for use in the ad-hoc subprocess. Be sure to confirm that the Implementation property is set to “FEEL expression.”
Ad-hoc subprocess
Now we need to provide the ad-hoc subprocess with the list of tasks.
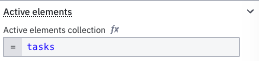
Select your subprocess and review the properties to find the Active elements. Expand this section and add the tasks variable as the Active elements collection for the subprocess.
Correlate the tasks to activate
The way tasks are activated is defined by their ID in the process, which has to correlate with the keywords we used: email, human, fraud. To simplify this, we will just set the ID for each optional task to the associated keyword.
Any task that does not have a task before it is a potentially activatable task.
- Select the “Generate Email Inquiry” OpenAI element and change the ID to
email.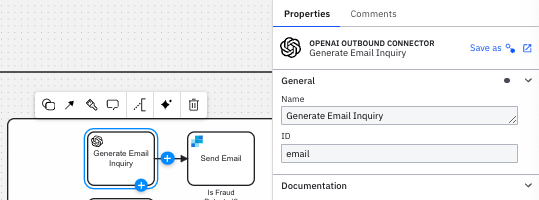
- For the “Call on Expert for Advice” human task, change the ID to
human. - For the “Fraud Detected” event, change the ID to
fraud.
Finalize all connector tasks
We need to update the remaining connector tasks to update the keys using our connector secrets.
Generate email inquiry
- Select the “Generate Email Inquiry” OpenAI connector task and update the OpenAI API Key with your secret.
- You will also need to update the prompt using a FEEL expression for this step. Copy and paste this prompt into the Prompt property for this task.
I’d like your opinion on if this hypothetical situation could be fraud or not.” + fullName + ” has submitted details of his economic status to a hypothetical government. They are as follow: Date of Birth” + string(dob) +
” Total Income ” + string(totalIncome) +
” Total Expenses ” + string(totalExpenses) +
” Charitable Donations ” + charitableDonations +
” Large purchases ” + string join(largePurchases , “, “) + ” can you generate an email to ask for clarification on anything you think is odd about this?”
Your Prompt should look like that shown below: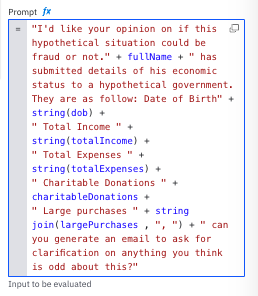
This prompt will be used to generate an email requesting clarification. - Now you need to configure how we will parse the response. This will look very similar to the previous configuration at the OpenAI task, but we are changing the variable assignment to
emailBody.{emailBody:response.body.choices[1].message.content}
Your result expression should now look like this: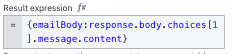
OPTIONAL: SendGrid task
If you have a SendGrid account and key, you can complete the steps below, but if you do not, you can just modify the “Send Email” task to be a User Task.
- Enter your secret for the SendGrid API key using the format previously discussed.
- You can enter “Tax Man” for the sender of the email since the question will be coming from our tax commission.
- Select the email address as the sending email address that you know is properly configured in SendGrid.
- For Receiver, we will use variables provided from our initial form:
fullNameandemailAddress. Don’t forget to click the fx icon before entering your variable names and you can use autocomplete as shown below.
Your properties should now look something like this.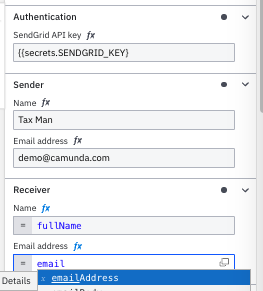
- Select “Simple (no dynamic template)” for the Mail contents property in the Compose email section.
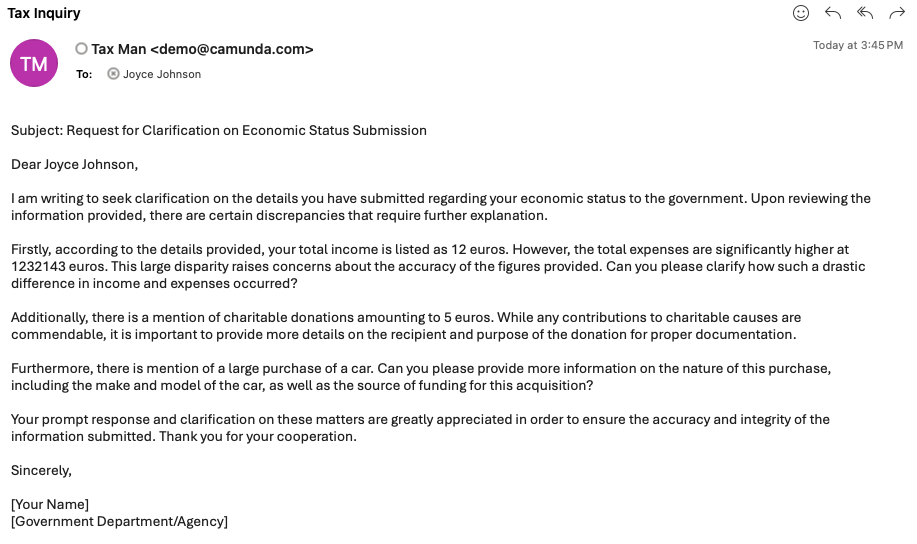
- Enter the Subject as “Tax Inquiry”.
- Select the
emailBodyvariable that is the response from the OpenAI email step prior to this one.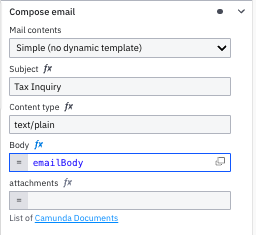
We also want to update the final OpenAI connector task “Check final Decision” with the proper secret and prompt.
- Enter your OpenAI API key using the format for the secret as previously discussed.
- Enter the prompt as follows:
“I’d like your opinion on if this hypothetical situation could be fraud or not.” + fullName + ” has submitted details of his economic status to a hypothetical government. They are as follow: Date of Birth” + string(dob) +
” Total Income ” + string(totalIncome) +
” Total Expenses ” + string(totalExpenses) +
” Charitable Donations ” + charitableDonations +
” Large purchases ” + string join(largePurchases , “, “) + ” When asked if this was fraud the answer came back as ” + string(fraudDetected) + “If you think this is accurate reply only with ‘yes’ otherwise reply with ‘no'” - Update the Result expression to use
finalCheckfor the variable as shown below:{finalCheck:response.body.choices[1].message.content}
Update gateways and events
We already linked the proper form to our human task, but we want to make sure that the output from that form is used for triggering fraud or not. In this case, we need to use the fraudDetected variable set by the checkbox on the form. Now we need to configure our exclusive gateway after the “Call on Expert for Advice” user task.
- For the “Yes” branch, you want to update the Condition expression property to use:
fraudDetected = true - For the “No” branch, you want to update the Condition expression property to use:
fraudDetected = false
Now we will configure the “Throw Fraud” event.
- Select the “Throw Fraud” event and expand the Escalation section. Select “Create New” for the Global escalation reference and set the new name to
Fraud!. - The Code field is what correlates the throw to the catch boundary event in our model. Set this to
Fraud!as well.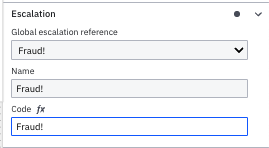
- Select the catch boundary event and select “Fraud!” for the Global escalation reference.

Finally, we need to configure the last exclusive gateway paths using the result from the “Check final Decision” OpenAI response.
- For the “Yes” branch, you want to update the Condition expression property to use:
finalCheck = "yes" - For the “No” branch, you want to update the Condition expression property to use:
finalCheck = "no"
Or you can set the “No” branch as the default flow.
Final step
We want to set a default variable to be used for the subprocess and set this as the input for the ad-hoc subprocess which will be fraudDetected.
- Select the subprocess and create a new input variable of
fraudDetectedwith a value offalse.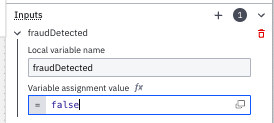
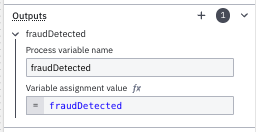
- Use that same variable with a value of itself to copy that variable back out of the subprocess as an Output variable.
- Now select the “Fraud Detected” event and set an output variable for that of
fraudDetectedas if this event is triggered, we have determined fraud was detected.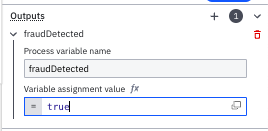
That’s it. You have completed the model and we are now ready to test it using the Camunda Play feature.
Step through your model with Play
While still within Modeler, click the Play tab so we can test this model.
Play will display the cluster that will access the secrets and use that cluster’s engine to run through the process.
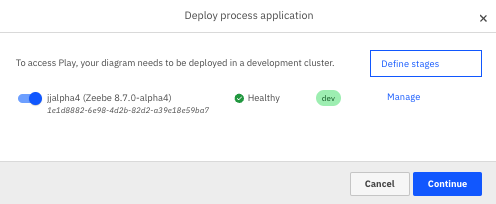
Click Continue.
When ready, Play will provide the following box:
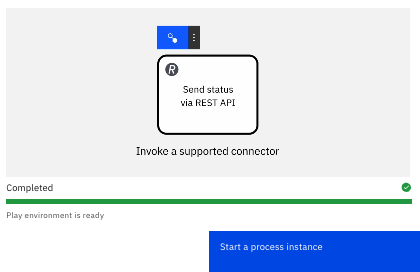
Click Start a process instance to run through the model.
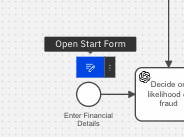
If I access the Start Form, I can fill in data and save that for future instances.
In this case I have filled in some data.
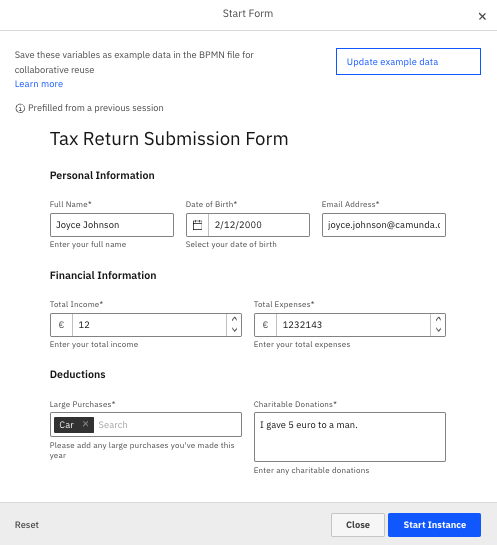
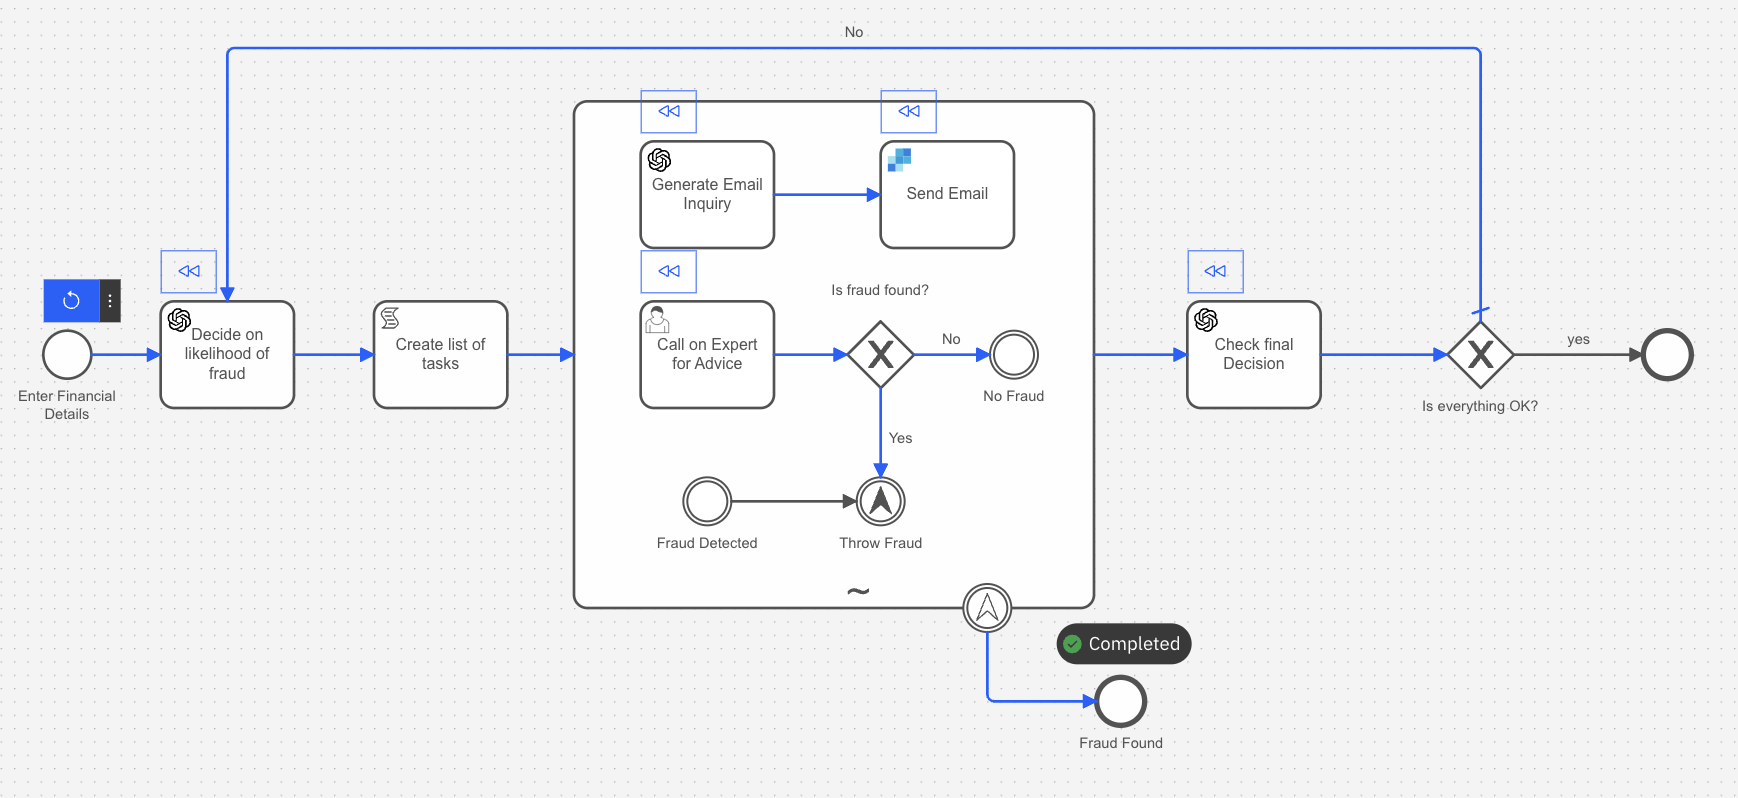
Click Start Instance to begin the run through. It will take a moment, but when the “Loading xxx details” disappears, you will see what tasks were initiated by the information entered in the starting form and review the variables and which optional tasks were triggered.
Note: Your results may vary as AI can return different results at different times.
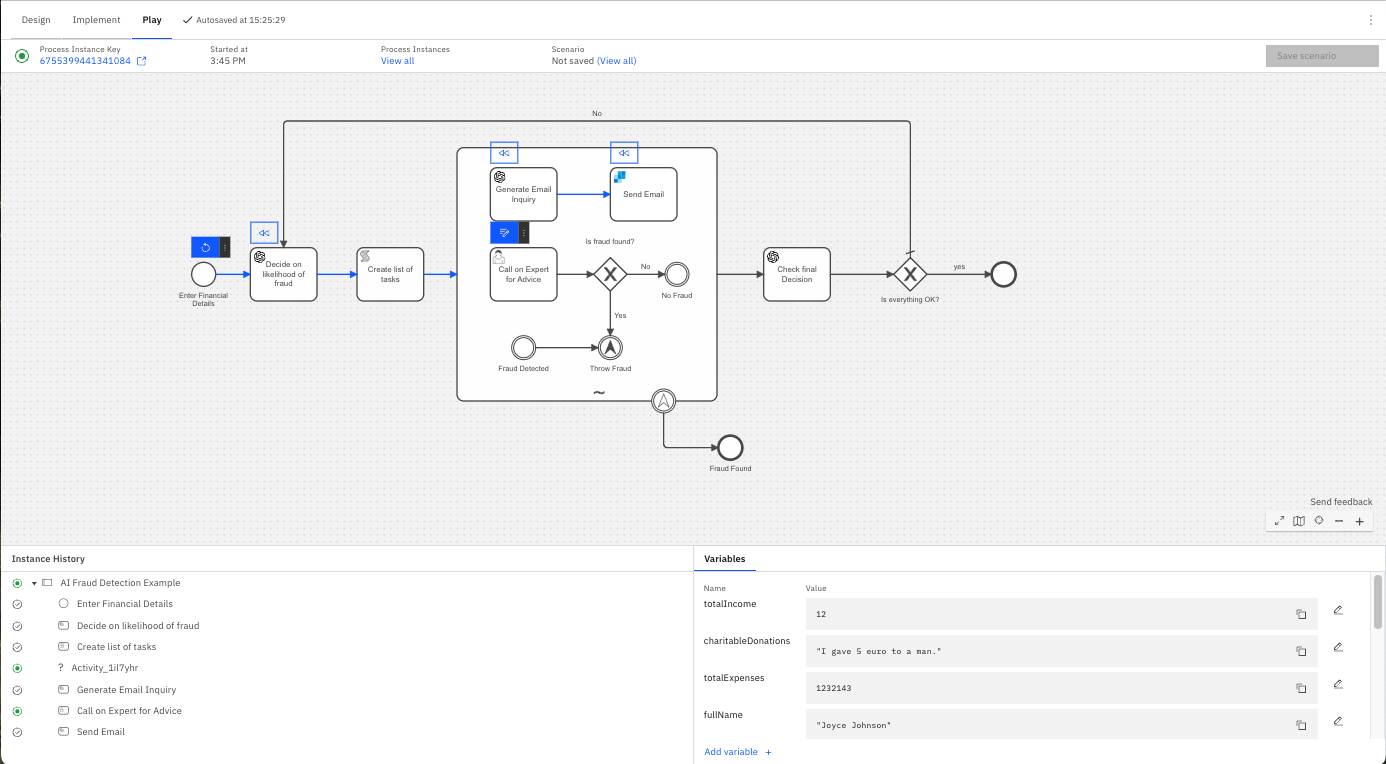
We see here that the email task and the human expert task was triggered by the input information. I can see the values of the process variables at the bottom of the screen. If I check my email, I get an email that mentions my expenses being much higher than my income.
If I select the form for the Expert task, I can fill in this form. In this case, I am going to determine that I do not think this is fraud and see what happens.

By doing this, the decision step triggered another pass through the ad-hoc subprocess which generated another email and another expert review.
This time I will select fraud for the expert human task. That action ends the process with a positive for fraud detection.
Congratulations!
You did it! You completed building an AI Agent in Camunda from start to finish including running through the process to see the results. You can try different data in the initial form and see what happens with new variables. Don’t forget to watch the accompanying step-by-step video tutorial if you haven’t already done so.
Start the discussion at forum.camunda.io